Ripping a DVD to iPod Video on Windows XP
If like me, you still have an iPod Video around, you may decide that you want to use it to store movies for when you travel, after all, you can hook it up to a TV using the video out cable so it makes a pretty good movie storage device.
Enter Handbrake
“HandBrake is a tool for converting video from nearly any format to a selection of modern, widely supported codecs.” Best of all, it’s free.
Handbrake has a number of features that you can use to tweak your video to your liking and export in the format that you need. In addition to the ability to specify your export settings, Handbrake has a number of built in pre-sets that allow for one-click setting of the export. Primarily, I use Handbrake to rip DVDs which I play through my AppleTV so I just use the appropriate AppleTV export preset.
Using Handbrake
In the following steps, I’m going to show you how to export video for iPod Video and then add it to iTunes but it’s basically the same for any Apple device (iPhone, iPod Touch, AppleTV).
First, you need to download and install Handbrake. This will also install the .NET framework if it is not already installed.
Once Handbrake is installed, the process is pretty straightforward.
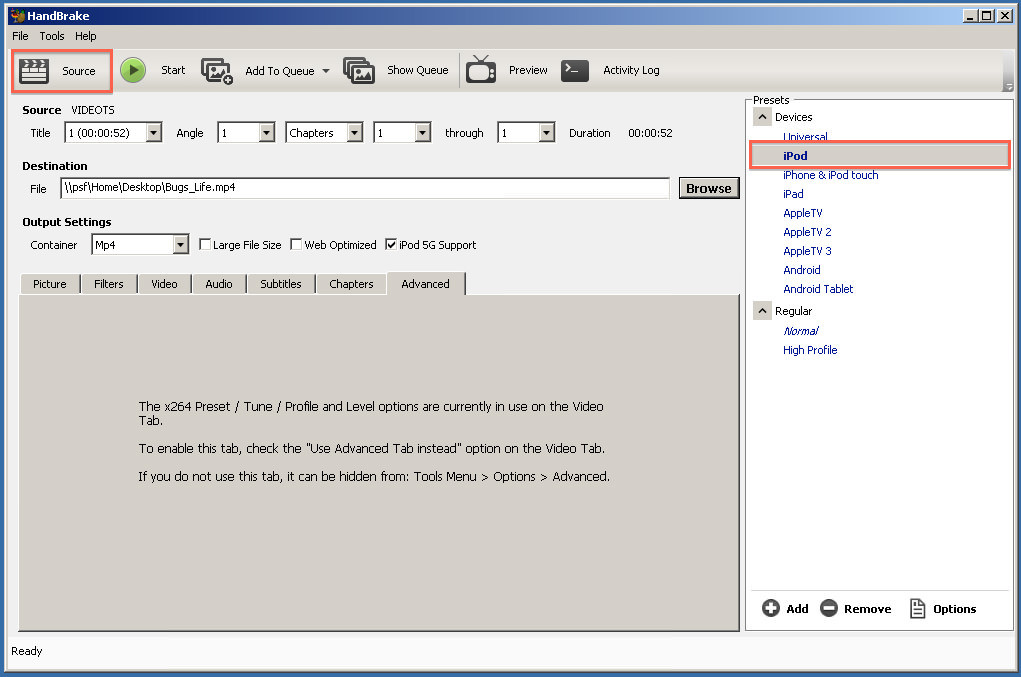
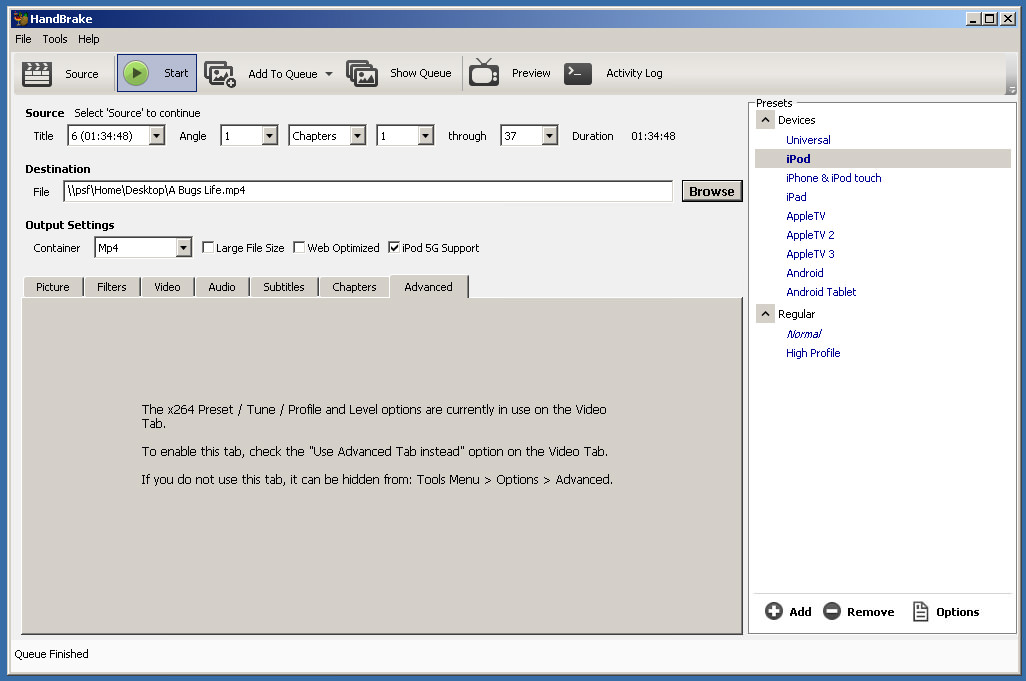
Select the Preset. Select iPod (or whichever your destination device is). If you select iPod, make sure that iPod 5G Support is enabled via the Output Settings checkbox.
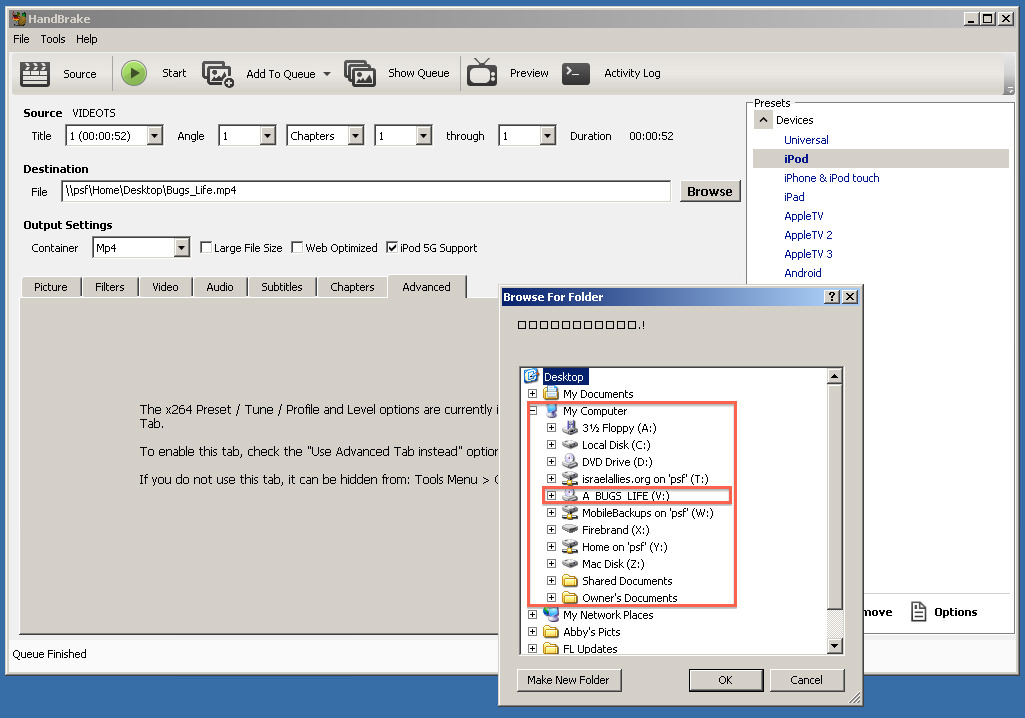
Select the Source. Click on the source icon, and then select Open Folder. You will now browse My Computer and find the name of the DVD in the device list. In the screenshot below, I selected the DVD, A Bugs Life to rip and then click on OK.
Handbrake will then scan the source for the video to be ripped.
Next, give the file a name - ie. A Bugs Life
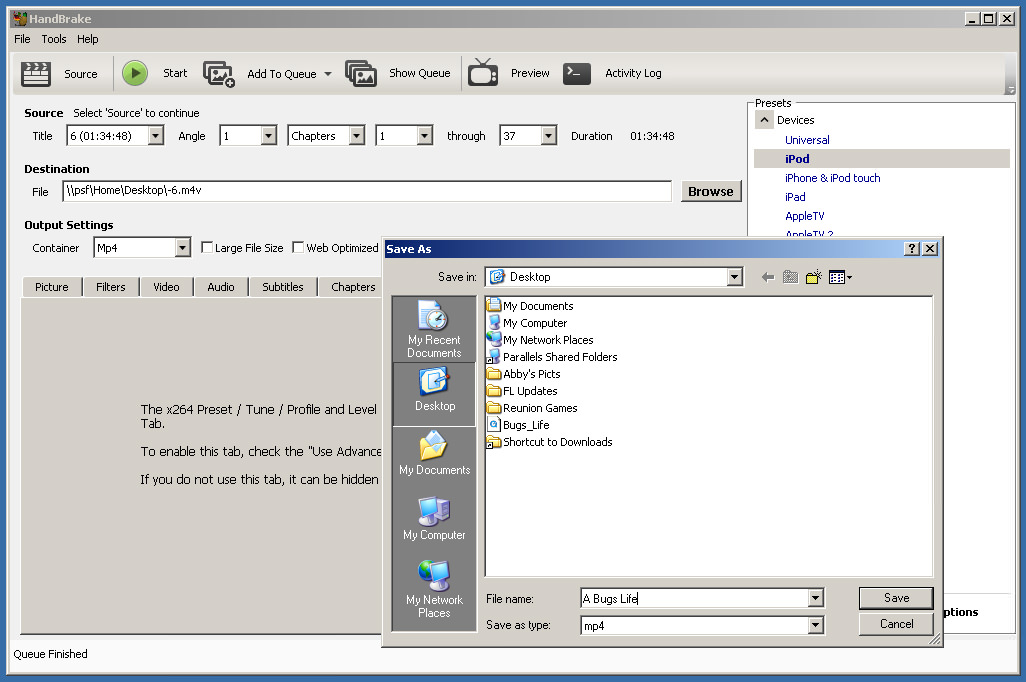
Finally, click on the Start button.
Handbrake will now rip the DVD to the desktop.
Once Handbrake has completed the encoding process, the file will be on your desktop - or the destination location that you selected. Once ripped, using the iPod 5G settings, the .MP4 file is around 542MB.
Now, you can drag the .MP4 file into your iTunes library.

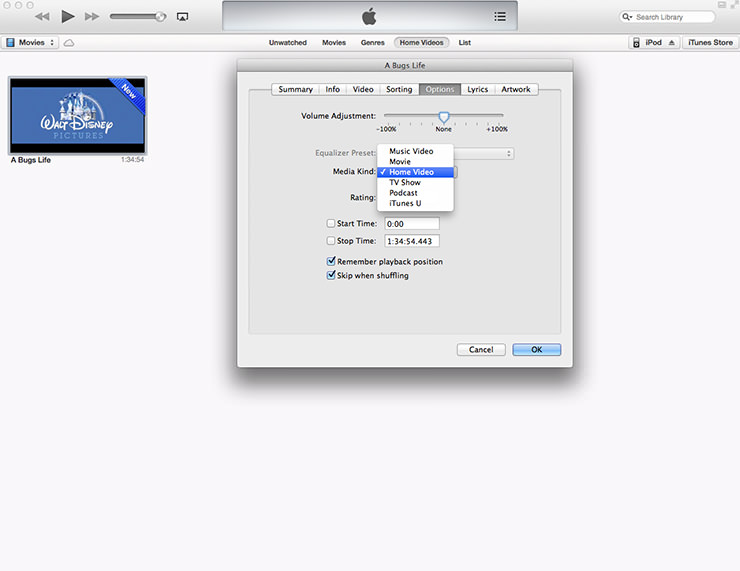
You may notice that the movie is not showing up in your Movies directory in iTunes. That’s because the video that was exported is categorized as a “Home Video” so it is found in the Home Videos directory.
To change this, right click on the movie and select “Get Info.” I’m doing this on a Mac so I’m not sure what it is on Windows but I would guess that it is similar. Under “Media Kind” select Movie instead of Home Video.
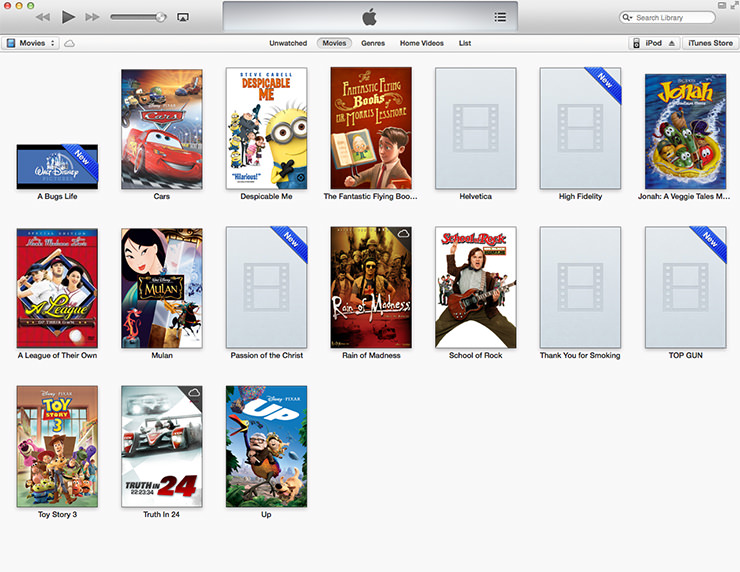
Now, your ripped video will should be displayed under Movies.
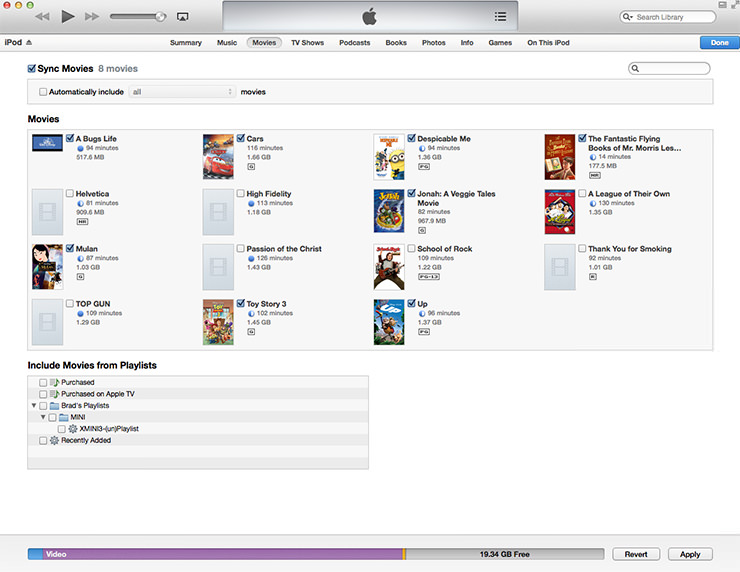
Finally, go into the settings for your iPod and select the check box next to the movie to indicate that it should be synched to your device. Now, hit “Apply” and the movie will be synched to the iPod.